An agentless scanner can detect every vulnerability without leaving a trace. It can silently detect vulnerabilities without installing an agent in each device. The agentless scanner operates discreetly, gathers all the vulnerability information, and self-destructs itself.
SanerNow now has a powerful agentless scanner that you can use for assessing vulnerabilities and misconfigurations in endpoints and servers. It’s a new feature of SanerNow and is efficient and agile. If you are hesitant to install an agent or the IT environment demands one, you can opt for the agentless scanner. It operates at the same speed and accuracy as the agent-based scanner and does not disrupt IT operations. Moreover, it need not be deployed permanently on devices and can perform on-demand and scheduled scans. By using an agentless scanner, you can scan the network in a non-intrusive way and observe the network.
- Reduce operational overheads for IT teams and ensure no performance impact
- Provide a good view of the network and the current status of vulnerabilities
- Ensure faster deployment with no additional resource usage or network bandwidth
How to perform Agentless Scans on Devices
You must follow three steps to launch an agentless scan using SanerNow Agentless Scanner. Also, ensure a designated SanerNow Network Scanner exists before proceeding with the below steps.
- Scan Config and Scan Policy Creation
- Assigning the Scan Config and Scan Policy to an existing Network Scanner
- Launch the Agentless Scan and view the results.
Scan Config and Scan Policy Creation
You must create a Scan Config and a new Test Policy to perform Agentless Scans on your devices.
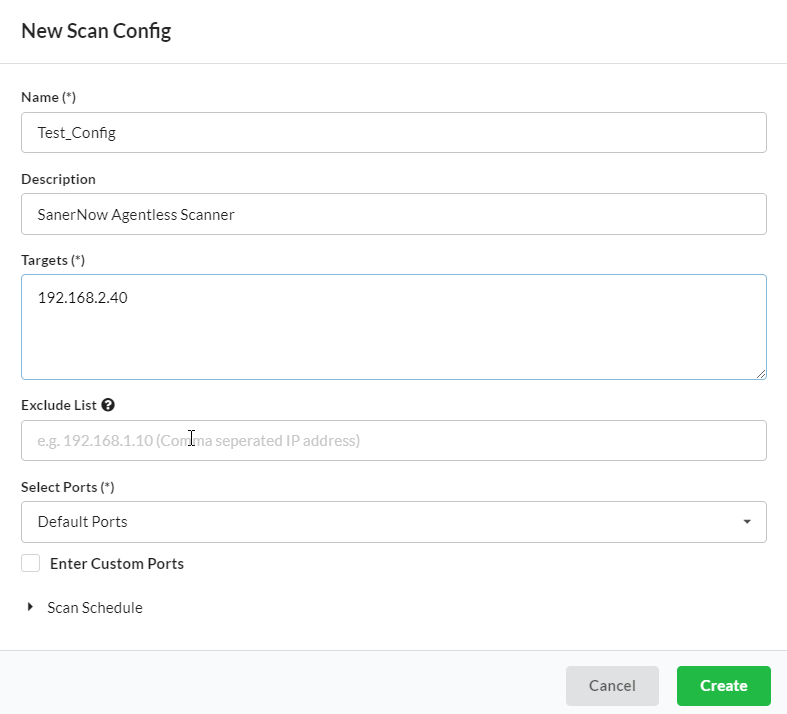
Go to the Network Scanner section on the Control Panel page. Create a new Scan Config and specify the device’s IP address you want to scan.
After successfully creating the Scan Config, click the Scan Policy button to create a new Scan Policy. Search for Local Security Check under the Family and select it.
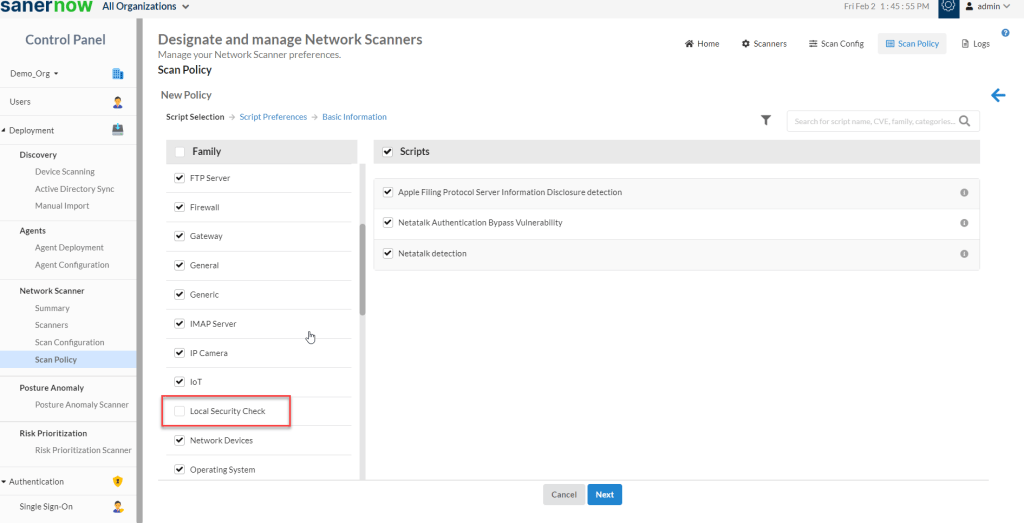
You will see two scan options listed on the right side – Compliance Scan and Vulnerability Scan.
SanerNow Agentless Scanner is capable of performing both scans at the same time. You can choose to perform one of the scans, either Compliance Scan or Vulnerability Scan, on the device.
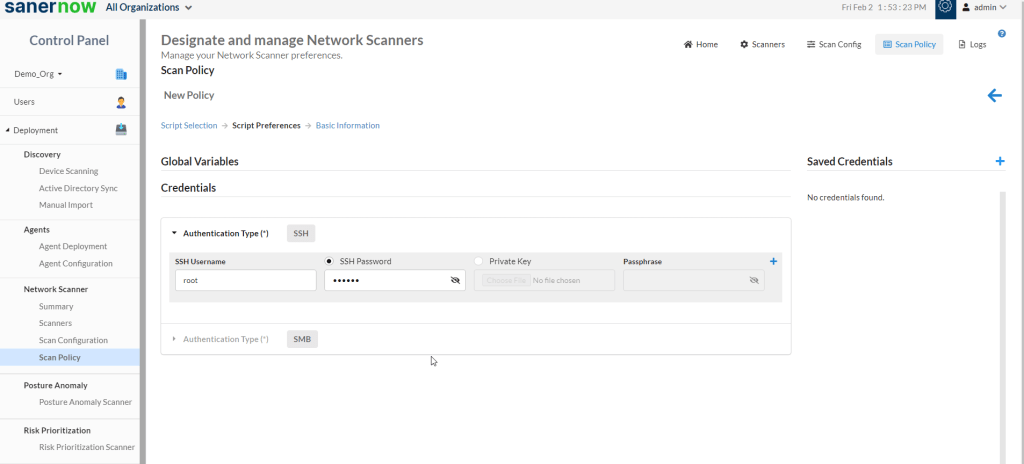
Once you specify the type of scan, you need to provide the credentials for the SanerNow Agentless Scanner to authenticate to the device. SanerNow Agentless Scanner supports both SSH and SMB-type authentication.
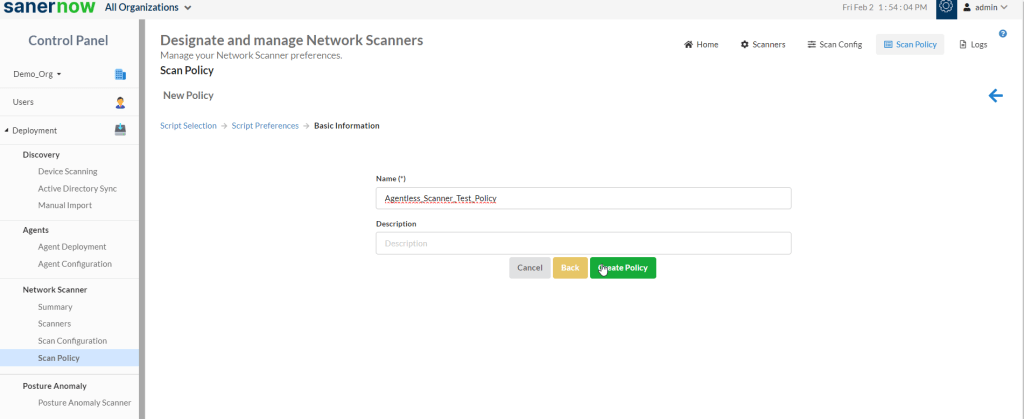
Provide a name for the newly created policy and click the Create button.
Assigning the Scan Config and Scan Policy to an existing Network Scanner
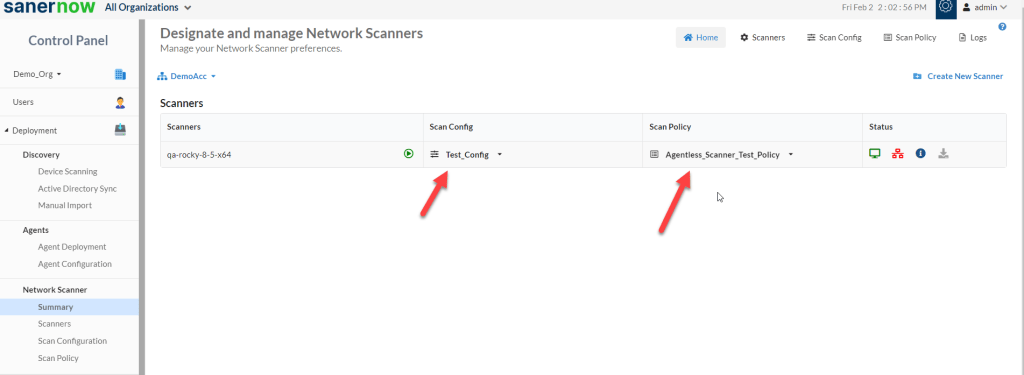
Before launching a scan, you must assign the newly created Scan Config and Scan Policy to an existing SanerNow Network Scanner
Launch the SanerNow Agentless Scan and view the results.
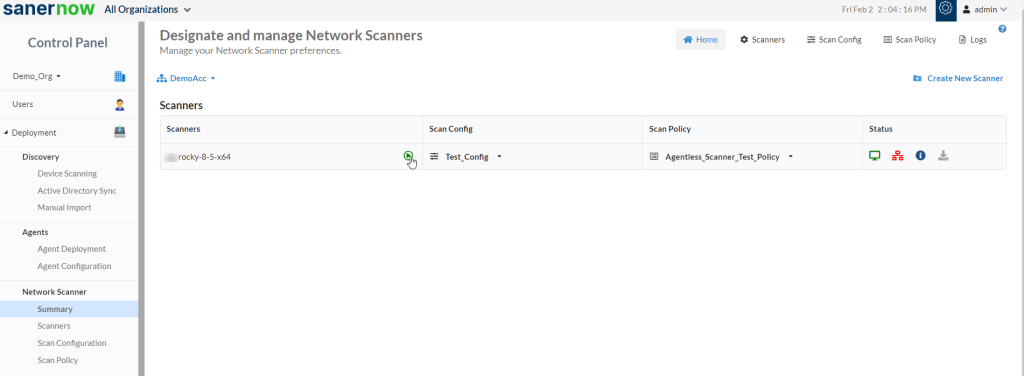
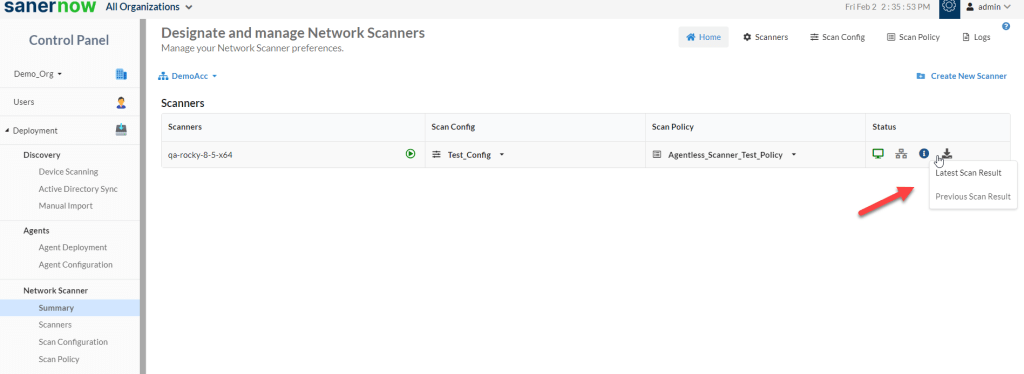
Launch the Agentless Scan by clicking the green play button next to the SanerNow Network Scanner.
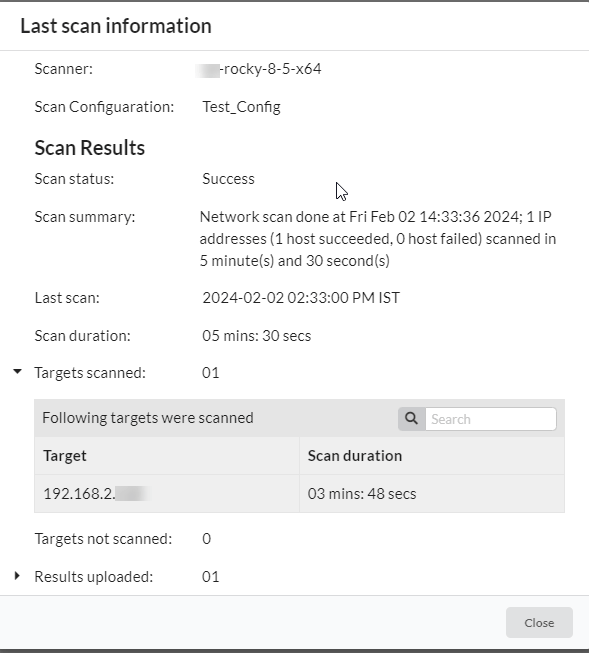
Once the scan is complete, you can view the scan results by clicking the Last Scan Information button under the Status table.
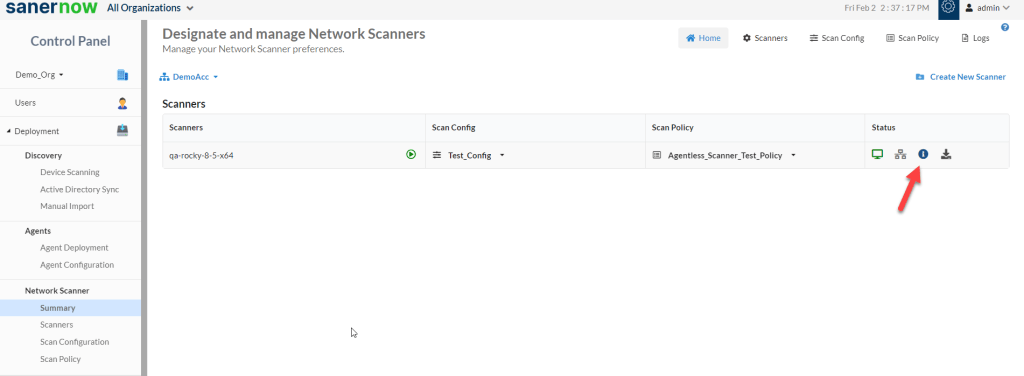
The scan results will look like the image below.
Also, you can download the scan results in PDF format by clicking the Download Scan Result button.
The device scanned by SanerNow Agentless Scanner will get listed on the Managed Device page under the All Devices section.
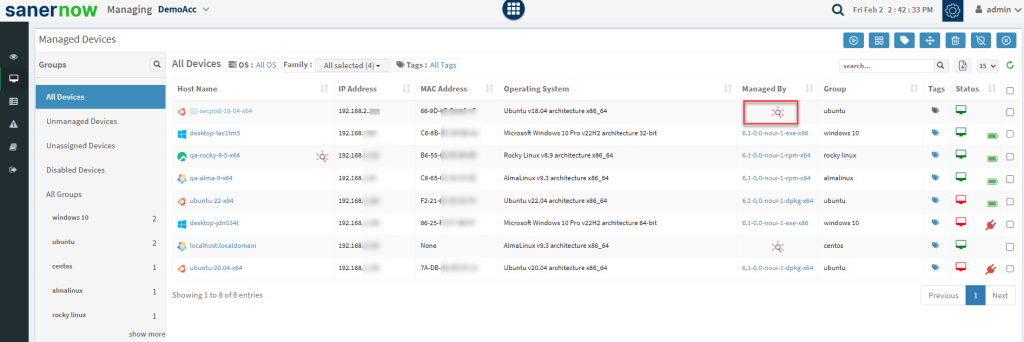
You can see the Network Scanner symbol under the Managed By table, which indicates it was scanned using SanerNow Network Scanner. Click the device to access the details.
On the Device Details page, on the top-right side of the page, the type of Scanner is listed as Remote. This means that the scan was performed using the SanerNow Agentless Scanner.
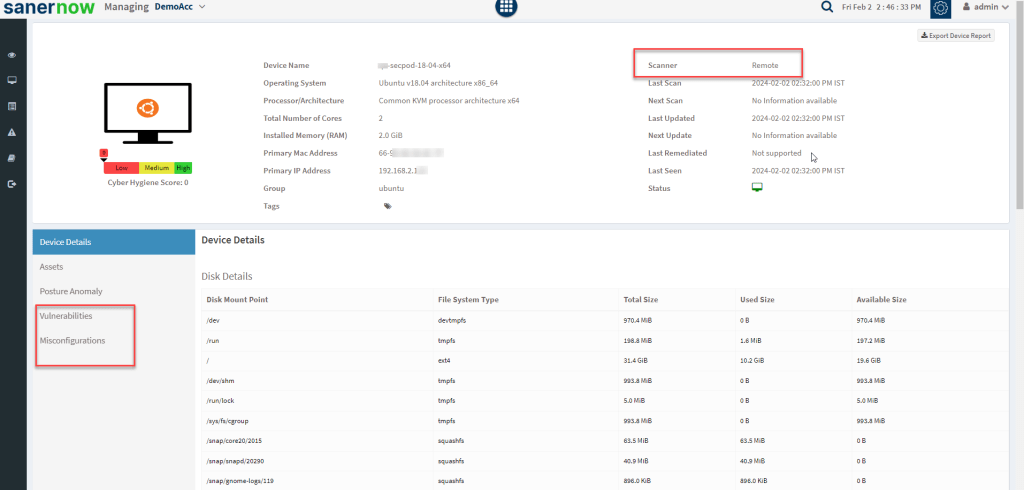
The type of scan selected lists vulnerabilities and misconfigurations on the right side of the page.


